KDE on PCLinuxOS Guide
Published by the United Nations Development Programme's Asia-Pacific Development Information Programme (UNDP-APDIP)
Kuala Lumpur, Malaysia
Web: http://www.apdip.net
Email: info@apdip.net
© UNDP-APDIP 2004
The material in this guide may be reproduced, republished and incorporated into further works provided acknowledgment is given to UNDP-APDIP.
This work is licensed under the Creative Commons Attribution License. To view a copy of this license, visit http://creativecommons.org/licenses/by/2.0 or send a letter to Creative Commons, 559 Nathan Abbott Way, Stanford, California 94305, USA.
Chapter 10 - Using the Open Office Suite
This guide has been modified by Papawoob to reflect the Linux distribution of PCLinuxOS 2007.
Introduction
OpenOffice.org (OOo) is a complete office suite, featuring a word processor (Writer), a spreadsheet application (Calc), and presentation software (Impress). Besides these fundamental office applications OOo also includes a vector drawing tool (Draw), allows database access, allows the publishing of documents in the Portable Document Format (PDF) and presentations in the Flash (SWF) format!
The OOo package is almost completely inter-operable with the Microsoft Office suite.
Getting around the package
As a first stop for information, it is important to know how the Help system works. To get help:
Help -> OpenOffice.org Help
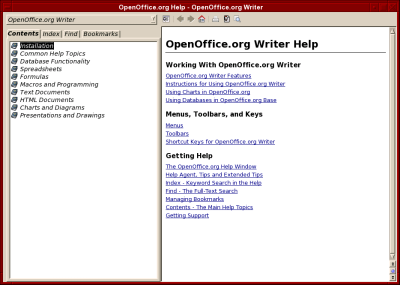
Fig. OO Help window
The search function is very useful, and pay attention to the Navigation Pane on the top left side of the window (where you can get help for the individual components in OpenOffice.org).
Setting up OpenOffice.org preferences so that it works the way you want it to is significant. The entire controls for this are available at:
Tools -> Options
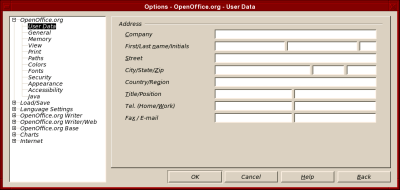
Here you can setup settings like the default measurement units, font substitution, language types and many more options. Saving a document automatically is not setup by default, so turning this feature on might be helpful: you find it at the Load/Save option, under the General sub-section.
There are two important toolbars to know:
Main toolbar - this is typically located right below the menus, and contains items like new document, save a document, exporting to PDF, copying & pasting, as well as access to the Navigator, Stylist, and Gallery.
Object toolbar - this is right below the main toolbar, and has access to font control, and other attributes of objects.
Writer
This is a powerful tool for creating professional documents, reports, newsletters and so on. It is a word processor that allows easy integration of charts and pictures, as well as other OpenOffice.org-compatible documents. It can create everything from a simple letter to books, with professional layouts, and the use of styles.
Start it from the Main Menu by,
Main Menu -> Office -> Word Processors -> OpenOffice.org Writer
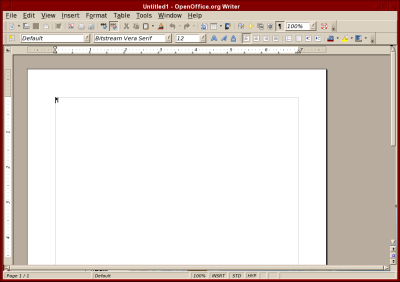
Fig. OpenOffice.org Writer
You are now presented with the word processing portion of OpenOffice.org and the interface is similar to other word processing tools available. Rather than providing guidance throughout the entire package, we will just concentrate on a few tasks at hand.
Common Functions
Functions of the word processor can be controlled via the toolbars located at the top of the screen. On the first row, file actions like opening and saving files can be performed, while on the second row, changing the font, size, and style (bold, underline, or italics) are located there.
They can also be controlled by the menus that are common through packages:
File -> New -> Text Document - creates a new empty, untitled document for you to work on.
File -> Open - opens the selected file.
File -> Close - closes the document you are working on. If changes have been made since your last save, you will be prompted to save or discard those changes.
File -> Save - saves the document you are currently working on.
File -> Save As... - saves an updated version of a document in a different location, with a different name, from the previously saved version.
Common Operations
For operations while writing, it is common to want to select a lot of text, copy it, maybe cut it from its current location and paste it elsewhere, or even undo an action. All this is possible with the office suite, and such options are available at the Edit menu. A few common options are:
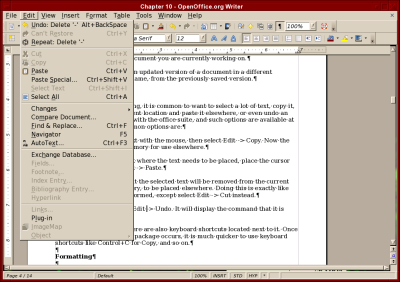
Fig. Common operations
To copy text: select the text with the mouse, then select Edit -> Copy. Now the selected text is kept in memory for use elsewhere.
To paste text: find the spot where the text needs to be placed, place the cursor there, and then select Edit -> Paste.
To cut text: this means that the selected text will be removed from the current location and kept in memory, to be placed elsewhere. Doing this is exactly like how a copy should be performed, except select Edit -> Cut instead.
To undo an action: Select Edit -> Undo. It will display the command that it is undoing at the moment.
By browsing the menu, there are also keyboard shortcuts located next to it. Once more proficient use of the package occurs, it is much quicker to use keyboard shortcuts like Control+C for Copy, and so on.
Formatting
Formatting text is as important as writing the text, and Writer provides many formatting options, including the Stylist. Individually, you can also format the character (current selected item, or even a whole word), the paragraph, or even the page.

Fig. Part of the Formatting toolbar (Writer)
Some of the quick format options include bold, italics and underline. These options are available at the toolbar at the top of the screen.
Text alignment plays a large role in controlling how portions of the document will look. For example, an address field at the top of your letter will have such details right-aligned, while the body and rest of the base text will be left-aligned. This is all controlled by the four-icons that are located next to the bold/italics/underline icons, providing such options as: right-align, centre-align, left-align and justified. When text is justified, it looks exactly like what you're reading now! (a more professional end-to-end stretch of the text.)
Let's switch to the end of the toolbar, and notice that the options there including providing a paragraph background - which is good for highlighting a paragraph or several paragraphs of text, in colours that you choose. You can also highlight text (like you would with a highlighter and paper) and change the font colours all with the icons there.
Aligning text by indenting it is also another feature available as part of the object toolbar. Left/right alignment of text is provided, and if text is already entered and you want to left-align it, selection of text (or having the cursor at the paragraph) must happen first, before text is indented.
Those were just quick controls. To get full control, using the Format menu is ideal. Controls are more varied here.
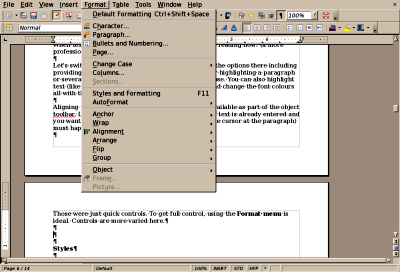
Fig. Format Menu
Styles
Consistency throughout a document is important. It was earlier said that writing books using OpenOffice.org is possible. So there must be a way to handle long and large documents in a consistent fashion, with similar fonts for headings, sub-headings, text, and other attributes within a document.
OpenOffice.org includes a powerful feature known as styles, and this is accessed via the Stylist (you can access this by hitting the F11 key, or clicking its icon on the main toolbar). Notice the floating window, which is most likely active at the "Default" style. By right-clicking on the style, there are options to modify the style, or create new custom ones.
By going to the modify option, the style can be customized via many varying attributes including spacing, alignment, font, emphasis, colour and many more. Once suitable styles have been pre-defined in the document, they can be used on existing text just by selection, and double-clicking on the style name.
Just a little bit more...
Now that the gist of the Writer package has been covered, there's just a little more to know.
Writer has a built-in spell checker. This can be accessed via:
Tools -> Spellcheck
The option to auto-spellcheck means that while typing, Writer will dynamically check your spelling, and if it detects an error, it will output a red-line at the bottom of the misspelled word. Keep in mind that the spell checking is based on the current language that is in use. This can be changed via:
Tools -> Options -> Language Settings -> Languages
Accessing word counts in the document is different from most other packages on a default install of OpenOffice.org (this can differ with several Linux distributions' offerings):
File -> Properties -> Statistics
It is under the Statistics tab that the word counts and other relevant document counts are based. On certain vendor modified distributions of OpenOffice.org, going to the Tools -> Word Count menu will allow the Statistics dialogue box to be displayed automatically.
The AutoCorrect (Tools -> AutoCorrect) options have replacement tables (so that CDs really are valid, and will not be changed to Cd, for instance). There are also word completion options (very useful, as the software starts thinking for you) and settings to make them more user-friendly.
The Navigator is a yet another useful tool (get this via hitting the F5 key or clicking its icon on the main toolbar), especially when dealing with larger documents. It supports jumping to bookmarks, notes, any particular object, and even creates a table-of-contents on the fly, based on the styles that are being used.
Calc
This is the spreadsheet component of the OpenOffice.org package and contains many useful features, including an array of functions and plenty of charting options. It is fully inter-operable with Microsoft Excel, though the function separators differ in the two packages.
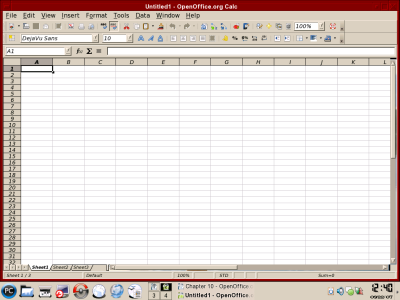
Fig. OpenOffice.org Calc
To start this, it is available via:
Main Menu -> Office -> Spreadsheets -> OpenOffice.org Calc
or if you already have an existing window of OpenOffice.org open,
File -> New -> Spreadsheet.
Spreadsheets contain many rows and columns, and each row and column combination is called a cell (like A1, B4, and so on). Upon inputting text into a cell, you might realize that the text is wider than the cell allows for - this can be re-sized via right-clicking the cell, and selecting the Format Cells option. There under the Alignment tab, selecting Line Break is what is required.
Formatting
Like other parts of OpenOffice.org, Calc also comes with the Stylist. But let's get around to understanding the various differing formatting options available in this component of the package.
If there is some information that you have already created and the area should be formatted, one particular quick and easy option is to use the AutoFormat function available in Calc. This is done after selecting the area then:
Format -> AutoFormat
These are pre-defined styles that are available in Calc, and if you have created your own particular style, you can add them into your new AutoFormat.
In the object toolbar, there is an option to set the font colour within the cell. There are also options to increase/decrease the indents within a cell, and in the image below, controls for enabling:
- Currency
- Percentage
- Add/Remove significant decimal places

Fig. Part of the Object toolbar (Calc)
These are quick controls, and accessing them is as simple as clicking the icons that represent them, and automatically the cell will be formatted as stated. Not only can Borders be set easily, and cell backgrounds too, but the alignment of text within a cell can also be set. This can be either as a top aligned, center aligned, or bottom aligned.
Now that most of the formatting options are known, it is easy to apply Styles to the spreadsheet. Bring up the Stylist by hitting the F11 key, and you'll notice that cell styles (that control all elements, including formatting) and page styles can be set (the latter controlling margins, headers/footers, and borders).
Spreadsheet basics
There are a few points to note when using a spreadsheet. One of them is that calculations are performed in a left-to-right format, with algebraic ordering rules. This means it deals with brackets ("()") first, then division ("/"), multiplication ("*"), addition ("+") and finally subtraction ("-").
When applying calculations, keep in mind the range of included cells. When using a function like =SUM() and using the argument =SUM(A1:A4), it means it looks for the sum of the cells A1, A2, A3, and A4. These operations can also be performed on non-consecutive cells, so, =SUM(A1;A4;A7) just executes the sum of cells A1, A4 and A7.
If you have used Excel before, it would be relatively common to use a comma (",") as a separator character between the parameters, however, with OpenOffice.org Calc, the separator character is a semi-colon (";"). So for the function to validate correctly, an expression such as =IF(B3>0;A1-A2;A1+A2) is correct (as opposed to replacing the ";" with ",").
Building functions
To perform calculations, spreadsheet makes use of functions. Common functions include =SUM() for summation, =AVERAGE() for the average value of cells, and so on. As an aid to the novice user, OpenOffice.org provides a Function AutoPilot. This is a wizard to help build formulas, and find problems with existing expressions.

Fig. Function AutoPilot Button
Located next to the universal sum function, is the Function AutoPilot. If you click on it, a pop-up dialogue appears.
In the Functions tab, you can filter viewable/accessible functions via category, and the option to choose a function is shown. Use your mouse to choose a function that you plan on using.
Once the correct function is selected, and the action that it performs is agreeable (it is displayed on the right of the dialogue), select Next to move on.
Now you are allowed to input numbers. Assuming the AVERAGE function was chosen, in the number 1 field (for example), there are options to either enter a function or select a range of cells.
Use select a range of cells and now a different dialogue pops up and you can use the mouse cursor to select a range of cells. Click on OK, and you're done.
That is a very easy way to build a formula, which requires no prerequisite knowledge about what formulas exist in Calc.
Sorting
A big part of dealing with spreadsheets involves a lot of sorting and filtering of data. To sort a dataset, selecting the active cells, then clicking:
Data -> Sort
This will produce a pop-up dialogue that has options for sorting the data based on the columns present, as well as if the data should be ascending or descending.
Charting
Converting data into information is a process usually accomplished well by creating graphs and charts. It is a lot easier to infer based on visual graphics, rather than lots of numbers. Calc provides a charting wizard that will allow this to be automated rather easily, with a lot of predefined settings.
Select the cells that are to be charted, and then go to Insert -> Chart.
The range is pre-selected, and certain options are provided (like where the resulting chart is); just leaving the pre-selected options will be good for the exercise. Click Next.
A type of chart is to be chosen. Common charts include pie chart, line graphs, or even bar graphs, it all depends on the information being represented.
Select the defaults, and create a chart. (You should now see a bar chart created).
Now that a chart has been created, it is not static in the sense that it cannot be edited, you can control each and every aspect of how the chart looks. Double-click the chart, and you will now go into edit mode. Notice the toolbar by the left-hand side of your screen has changed? This is in direct response to it being in edit mode, and a lot of properties can be changed here.
There are plenty more features, like data filtering, scenario creation, and goal seek, which once you get more advanced with spreadsheet know-how, you will end up making use of.
Impress
No office suite is complete without a presentation piece, and OpenOffice.org shows its colours with Impress, the presentation piece of the suite. To start it, it is available at:
Main Menu -> Office -> Presentations -> OpenOffice.org Impress
or if you already have an OpenOffice.org window open, its available at:
File -> New -> Presentation.
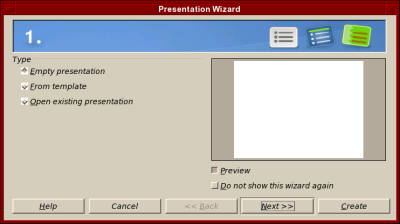
Fig. OpenOffice.org Impress
Unlike other components of OpenOffice.org, when you start Impress, you are presented with a Presentation Wizard to start creating your presentation. This gives you options to start a presentation with an empty template, or even with one of the pre-defined templates. A preview dialogue is available, and once all options are selected (and Next is clicked, to move on), you get a basic presentation.
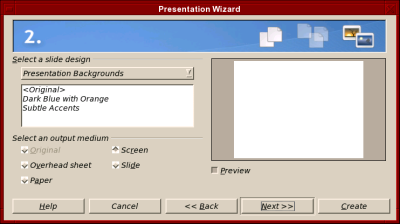
Fig. Impress Wizard for a new presentation
After choosing your background, click on Create and you will see the Presentation Main Page as seen below:
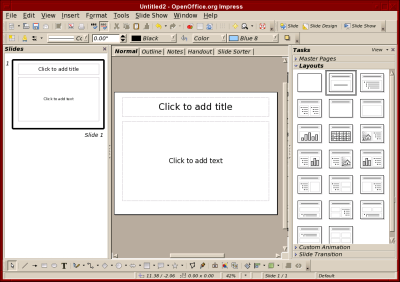
Fig. Presentation Main Page
Template Management
If a big portion of time is going to be spent giving presentations, its very professional to have the presentation look like each other, in the form of a template (same logo position, copyright notices, etc...). Once a template is created (or downloaded from the Internet), you manage templates via the:
File -> Template -> Organize.
Slide Design
A quick way to get slides done is via the Presentation buttons located at the top right of the window:

Fig. Slide Buttons
This provides a pop-up menu option that allows you to insert slides, or even modify the slide layout of the current slide.
Views
There are several views in Impress, and some have over-lapping names, but with different functionality. At the top of the center screen, you'll notice five buttons that look like what you see below.

Fig. View Buttons
The five options for workspace views are:
- Normal view - default, for slide design.
- Outline view - overlook of the presentation.
- Notes view - add speaker notes.
- Handout view - how handouts get printed.
- Slide Sorter view - birds eye view to add, change, switch slides around.
All the views can also be accessed via: View
Master Views are supported and to access this view, go to: View -> Master and then choose the one you want. You can have master views of all workspace views (i.e. a master view of the slide itself, notes, and handouts). The Layer view allows layering of slides (adding and removing), and layers can be non-printing or non-displayed on screen, but printing only.
Jazzing up the presentation
Objects, like video, Java applets, music, and even other graphics can be added (embedded) to a presentation very easily. To perform this, the following menu is useful:
Insert -> Object
Keep in mind that OpenOffice.org will only play content provided all relevant plug-ins are installed. For sound playback, it assumes an already configured sound-card, otherwise it will not work.
Effects are another supported feature in Impress and consist of things like slide transitions, mouse-driven bullet-points, and even drawing animations. To get to the effects pop-up, click on Slide Show on the Navigation Toolbar.
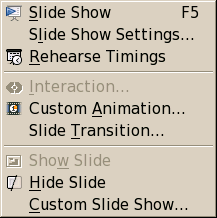
Fig. Slide Show Options
Performing slide transitions are also accessed via the effects menu. However, to create animations, the menu is:
Slide Show -> Custom Animation...
Here, simple animations can be created, like making your text move from side to side and fade in and out. This is done simply by clicking on Custom Animation..., highlight the part of your text that you would like to animate and then click "Add.." from the window on the right. This will create a popup window like the one seen below:
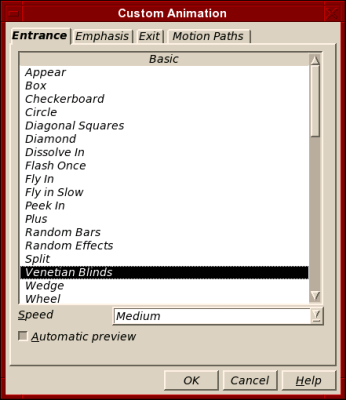
Fig. Custom Animations Window
Now you simply choose an option from each of the 4 tabs in the window above and then click on "Play" from the window on the right to see the effect you created.
Conclusion
OpenOffice.org has the ability to be a very useful software package. It includes very powerful, free alternatives to satisfy average office suite requirements. As this is only scratching the surface, there are plenty more resources available out there, so please, use the available documentation to its fullest.
I am sad to say that this brings us to the end of our KDE User Guide series. By the time you read this you should be able to download the entire guide in PDF format from our website at www.pclosmag.com.